Showing posts with label Recipe. Show all posts

Thursday, 4 February 2021

My Spicy Miso Chashu Ramen Recipe

I have always liked ramen and had been to a fair number of ramen restaurants across Canada but the first time I really learned what good ramen is was in Japan.  I lived down the street from a ramen restaurant chain that made an amazing miso chashu ramen. It wasn't a spicy ramen like I normally like, but it was greasy saltiness that was heavenly and so full of flavour that I didn't miss the spice.

Honestly after traveling around Japan I can't exactly pinpoint where my favourite ramen came from. I know I had amazing spicy miso ramen while I was there but really I just remember the one that was down the street. When I think of delicious ramen that is the place I think of. 


Now that I am back in Guelph I am lucky enough to say that I do actually have two delicious ramen restaurants that I can go to within the City, Kenzo Ramen and Crafty Ramen. Kenzo ramen does remind me a lot of the restaurants in Japan, but it's still not quite there. Even if it was exactly spot on I still have always wanted to make my own so I have experimented with a bunch of things and found something I very much like. I can't say if it is very authentic or not but it tastes damn delicious!  

Photo by William Delamare

Step 1: Stock/ Broth

I use chicken or turkey broth to make my ramen since this is typically the leftover bones I have to make broth with. When I am making soup stock for ramen I keep it very simple.

  • Bones from 1 chicken (or half a turkey)  
  • 4-6 cups water 
  • 1 tbsp salt 
  • Bay leaves (optional)
  • Onion or other vegetables (optional) 
  • Kombu kelp and dried bonito flakes can add additional umami flavour to taste. One square of kelp and a pinch of bonito flakes is usually enough.

Put the bones into a large pot. Fill the pot with water. Add a little salt and the bay leaves. Bring the pot to a boil then reduce to low heat and let it simmer. I usually let it simmer for at least 6 hours and top it up with water as needed. If I am making this well in advance of when I want to make ramen, I let it boil down into a stock so I can store it in a jar in the fridge easily. Strain liquid into a bowl to get the bones out. 


If you want to skip this step you can cheat and just buy broth. 

Step 2: Chashu Pork (Braised Pork Belly)

  • 1 pork belly
  • 2 tbsp sugar
  • 1/2 cup soy sauce
  • 1/2 cup mirin (ooking sake)
  • 1 tsp neutral oil (Sesame oil, canola oil or sunflower oil works. Not olive oil!)
  • Black pepper to taste
  • Pinch of salt
  • Ginger, garlic and/or green onion to taste

There are two common ways to make Chashu Pork. Either way you should marinade pork belly overnight. I tried with other cuts of pork and it just wasn't the same. The fattiness of pork belly really contributes to the texture and flavour. If you don't see pork belly offered then you can ask the butcher in your grocery store. Bacon is sliced from pork belly so the butcher typically does have larger blocks as well, but most people want to buy them as cut pieces. Make sure to buy a piece without skin or rind unless you want to remove that yourself as well. I forgot to remove it once and it added a very odd metallic taste - almost like liver.

If you are cooking the Chashu Pork to eat with dinner that night I recommend marinading overnight before the day you want to cook it. If you are cooking it in advance then you can marinade it more after it is cooked to get additional flavour into it. This is a personal preference and you don't need to do it. It will still be delicious. 

To marinade I mix 1 cup soy sauce with 1/2 cup mirin.  I personally add in garlic, black pepper, sugar and ginger. I've read elsewhere that people add green onion and salt, but I find the pork is typically salty enough and I can't really taste the green onion over the other flavours. If you've not marinading before hand you will mix the exact same things in a pot to cook it day of. When I haven't been able to get mirin I have honestly just used soy sauce and it was still delicious.

So now the different methods in order from the most work to the least.

Rolled:

The fancy way of making it is to roll it into a log and tie it. Click Here for a really good description on how to roll it and cook it as well. Rolling it keeps the center moist but still allows it to absorb flavour. This is actually my favourite way when restaurants make it, but I find it is a lot of work so I wouldn't typically do this myself, unless for a special occasion.

If you marinated overnight pull the log out with tongs and braise the log by essentially frying it on high heat in a neutral oil until the outside is nicely browned. I don't have a cast iron pan but those really are the best for doing this. 

Then put the log into a pot that it can fit lengthwise into and pour the marinade over it. Ideally the sauce should reach about half way up the log or more. Turn the log on occasion so that each section gets the flavour cooked into it. Alternatively, you can use a slow cooker, dutch oven or even a pyrex in the oven on low heat for this. Results can be slightly different for each method so it really just depends on your personal preference and what you have to work with.No matter what you do you are going to simmer (low heat) until it has cooked through (~2 hours)

After it has cooked you can store it in a ziploc or tupperware overnight with some extra sauce for use in ramen the next day. I must admit that slicing it the next day when it has cooled down is easier, but most of the time I wait until it has cooled a bit and just cut it up and serve that day since I marinade overnight before cooking.

This way does involve simmering it for 2 hours.... Hence why I often prefer to do either of the following two methods.

 Block:

The other common way of making it is to simply cook the block. This is much easier and faster but you need to be careful not to overcook it so that the center of the block stays moist. Essentially you do exactly as I have described for the rolled method but without rolling up the block of pork belly.  This does cook faster too! I'd say it takes about half the time.

Sliced:

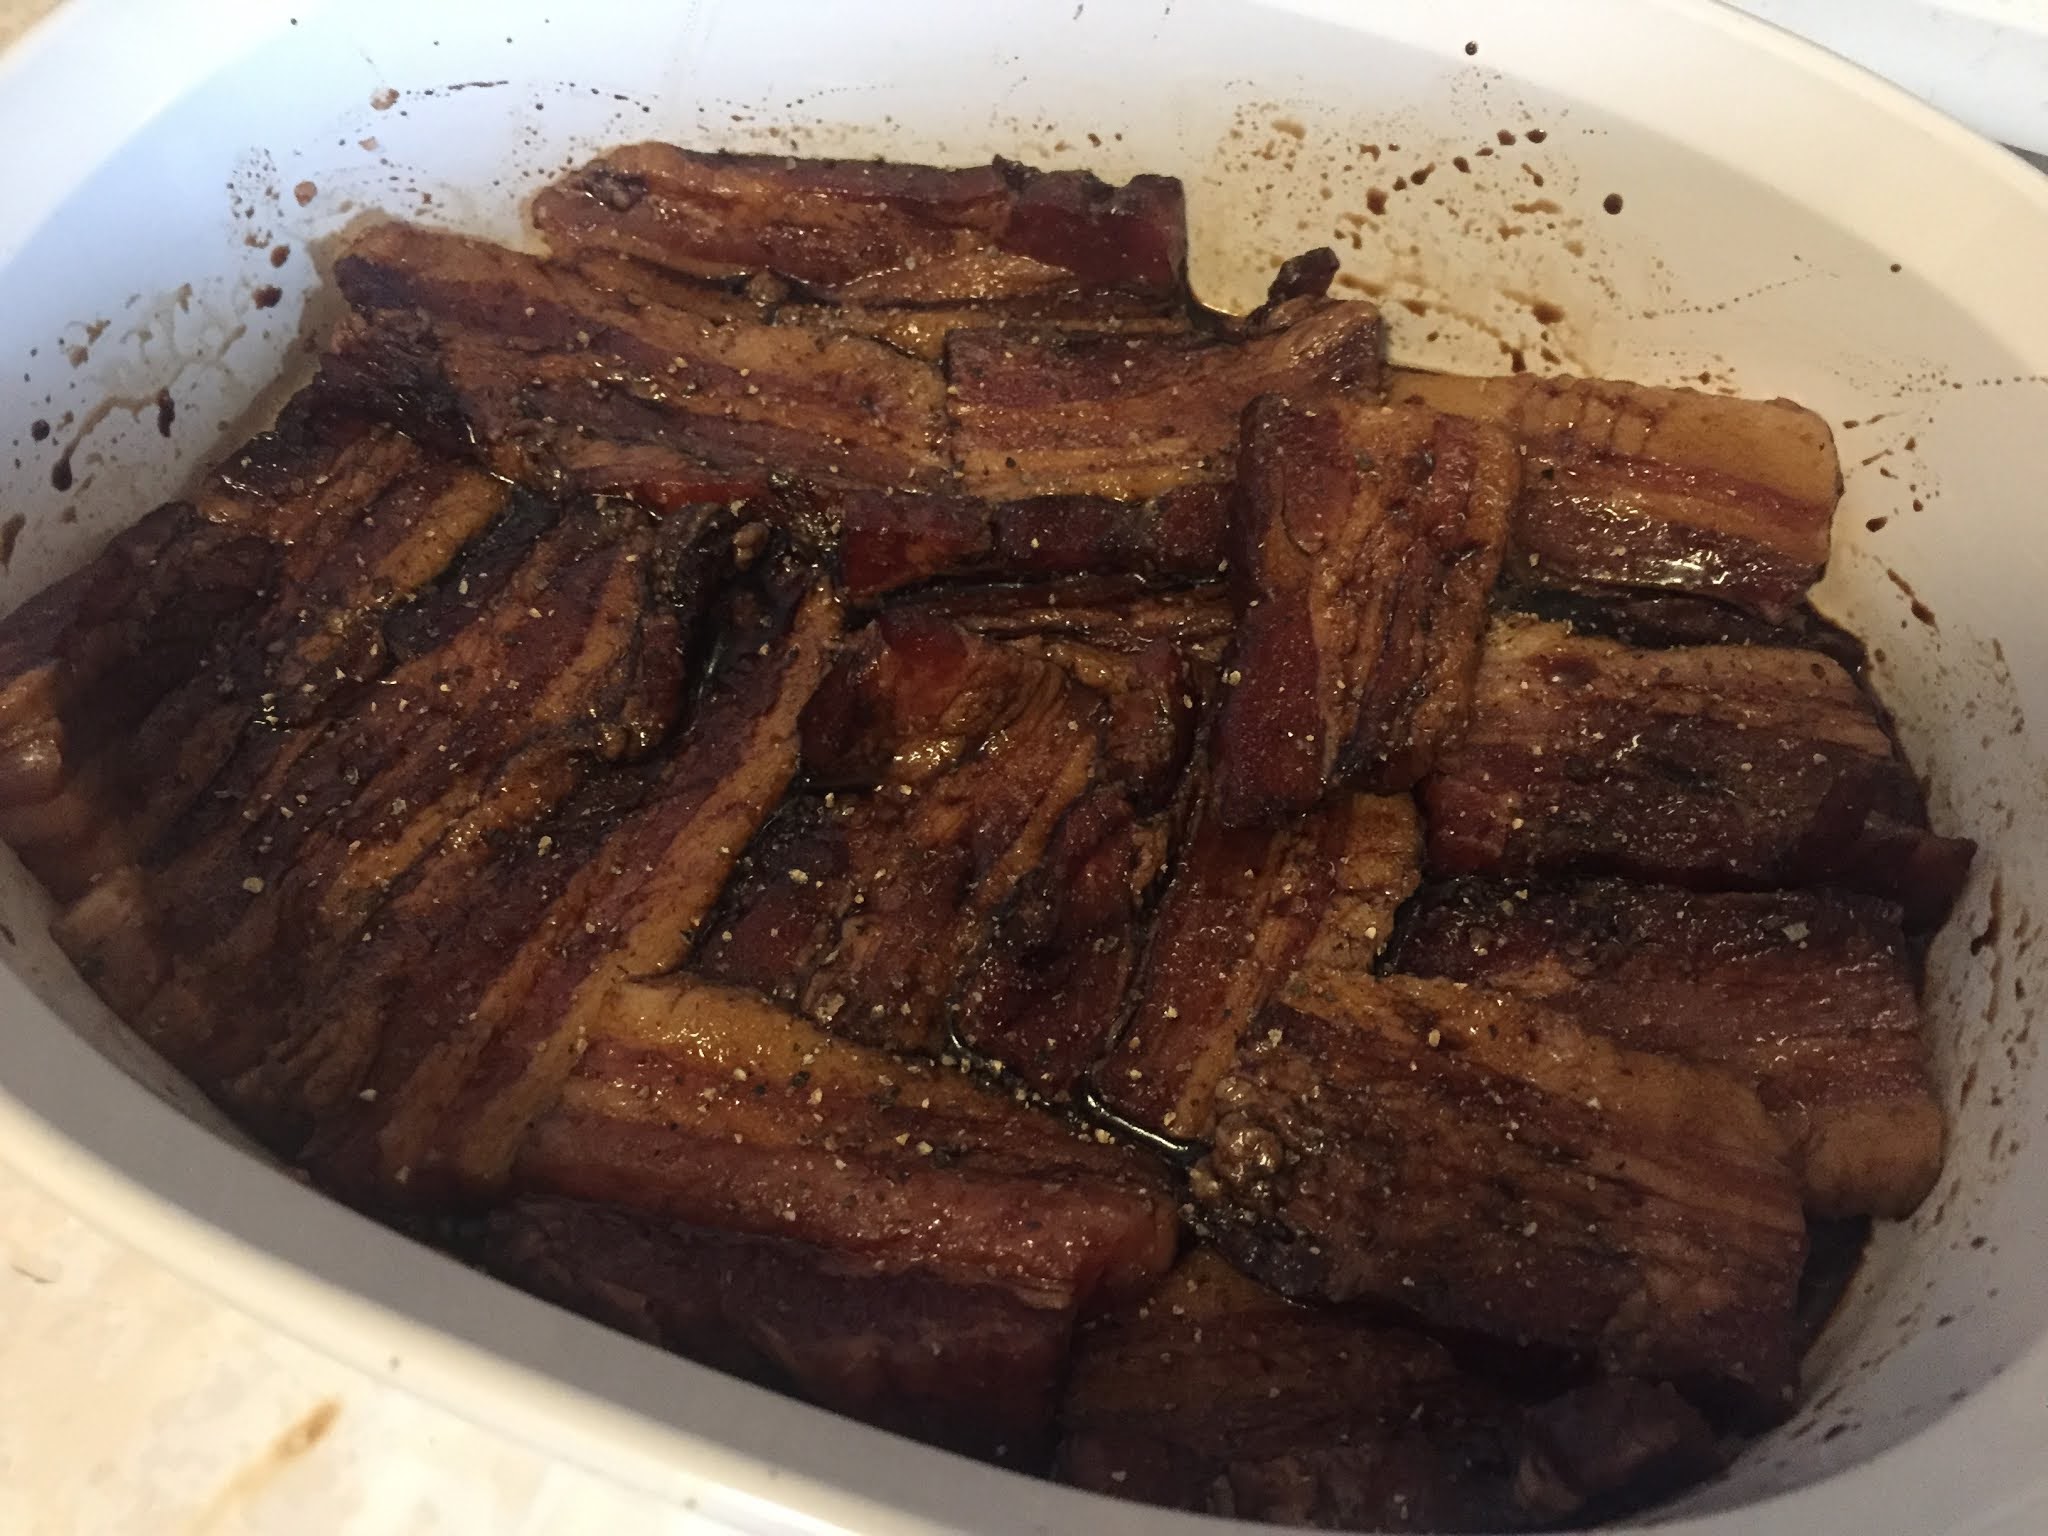
I have at one time or another gotten super hungry and wanted my meat to cook as fast as possible so I also made a third completely non-official or proper way. First mix the soy sauce, mirin, oil, garlic and ginger together. Then cut the pork belly into thick slices, lay them flat in a pyrex dish, cover with soy sauce mixture. Sprinkle salt, pepper and sugar over top of the slices. Let all that marinade overnight in a pyrex dish and then pulled it out and stuck it in the oven. This cooks much faster than the above methods and actually gets a tonne of flavour into it because it has a higher surface area directly soaking and cooking in the sauce. It being soaked in the sauce fully also means you don't have to deal with flipping it at all. When I do it this way I cook it in a pyrex dish in the oven with the lid on. It takes about 30 minutes at 375F. To me it tastes just as good as the above methods but is very easy. 
 

Step 3: Soup! 

  • 1-2 tbsp garlic finely diced or grated (approximately 6 cloves)
  • 1-2 tbsp ginger finely diced or grated (a 1 inch piece)
  • 2 tbsp sesame oil 
  • Spicy bean paste or chilli oil to taste (I like about 1-2 tbsp)
  • 2-4 tsp miso paste (I personally prefer yellow to red but have no rational reason why)

Now lets turn that chicken stock (or broth if you kept it watery) into a nice ramen soup!  If it was boiled down to stock you will probably want to add some water to it so that it isn't as strong. So dilute it to a flavour level that you like. I like mine on the strong side so I add very little water to it at this point. I do add the garlic, ginger and chilli oil though to get even more flavour! Note the only reason I have separated the stock/broth from this is that I use a very fine mesh strainer to get the bones out when making the stock/broth and I actually want the garlic and ginger to be in the soup. So in order to make sure they don't get strained out I put them it at this point. If you put that in sooner you'll probably just get more flavour out of it. You could do this by putting in the whole clove of garlic and piece of ginger into the soup then dice these after it is strained and add them back in.

At the point where you start on Step 3 you should already have cooked pork or it should be cooking at the same time.


Step 4: Ramen Egg

Bring a pot of water to a boil. Once it has started boiling lightly drop in however many eggs you want to make. Set a timer for 5-8 minutes depending on how runny you want your egg to be. When timer goes of pull the eggs out and run under cold tap water or transfer to a bowl of cold water if doing multiple at once.

Knock on the egg with a spoon to crack the entirety of the shell surface or gently roll on hard surface to crack the shell. Gently peel off the shell layer. 


Put in s ziplock or tupperware with leftover Pork Chashu sauce and marinate overnight if you want it to be flavourful or just put it in the ramen bowl and cut it in half if you want it to be less work and dishes. Cutting it in the ramen bowl means you don't need to deal with the mess of a gooey yolk exploding everywhere and then somehow getting that mess into the bowl. 

Step 5: Noodles

Cook your ramen noodles according to package instructions. I greatly prefer fresh noodles to dried ones. I think it makes one of the biggest differences in all the variations of ramen I have tried to make. 

Step 6: Other Toppings

To go along with the Chashu Pork, I put in a mix of toppings but these are some of my favourites:

  • Green onion
  • Bean sprouts
  • Mushrooms (Enoki or otherwise)
  • Sesame seeds

Other things that can go very well are 

  • Cabbage (very thinly sliced)
  • Sushi seaweed
  • Bok Choy
  • Palm hearts

Thursday, 8 November 2018

Bannock Bread Recipe

While living in Japan a frequent question I have gotten asked is 'what are Canadian foods or recipes?'.  Bannock is one of the easiest recipes that is a simple flatbread that was adopted from Scottish traders by Native Americans. It is a easily made, filling food that the explorers and traders to Canada frequently eat. Since it doesn't expire quickly it makes a great food for anyone traveling or living in the wilderness. Each indigenous nation in North America has their own version of bannock. It can be made with wheat flour, oats, barley, corn meal or from the local plant life (cattail pollen, moss, lichen, flour from seeds/acorns or dried roots). Some historians believe that aboriginal peoples in Canada were eating flat breads made from local plant materials before traders landed in Canada, making the Scottish version of the bread (made with wheat, oats or barley) easily adopted into their culture.

The bread has very few ingredients and can be made over a fire or at home in a frying pan making it great for camping or a simple at home treat for breakfast or a side to lunch or dinner.

It is typically eaten alone or with jam but topping with a little maple syrup can make it a nice incredibly Canadian dish. Mixing in some rosemary, maple sugar, blueberries or cheese can also make this simple dish incredibly flavorful. Basically you can experiment with adding a wide diversity of ingredients.

Since I used for an international potluck where everyone has to cook food from their own countries I actually tripled this recipe but here is the standard amounts for if you wanted to make about 8 bannock buns about 5cm wide and 2cm thick.
Ingredients
  • 2 cups flour
  • 2 teaspoons baking powder
  • 1/2 teaspoon salt
  • 1 tablespoon oil
  • 3/4 cup water
  • vegetable oil for frying
Instructions
  1. In a large bowl whisk together flour, salt and baking powder.
  2. Add oil and whisk together, gradually add water and stir until almost holds together.  Move to a lightly floured surface and knead together until dough sticks together. Mix in cheese, berries, rosemary or any other ingredients. 
  3. Divide into balls to desired size/ number and flatten with the palm of your hand. 
  4. Fry in hot oil on medium heat (enough to cover the bottom of the frying pan) until golden brown on both sides (and cooked on the inside). If cooking over the fire you can wrap the thick dough around sticks (but if doing this method use less water so that the dough is less soft/fluid) and cook like you would a marshmellow or you can cook on a flat warm stone beside the fire or in the hot coals and cook as above (tinfoil and oil optional).

Friday, 6 July 2018

Japanese Pork and Eggplant Stirfry

I must thank a couch-surfing guest, Sayaka, for teaching me this tasty Japanese recipe that includes many ingredients that are grown locally.  Eggplant and onion are two things that grow very well in Japan and specifically in the Kochi area, which I am living in.

Ingredients:
Shredded pork
Eggplant (sliced into longer quarters or cut into chunks)
Onion
Mushroom
Green pepper
Garlic (finely chopped)
Ginger (finely chopped)
Miso
Sake or Mirin
Sugar
Chilli powder or paste
Soy sauce
Sesame Oil
Shiso
Green onion

Method:
1. Fry pork with cooking oil
2. Add garlic and ginger
3. Add veggies starting with onion, then eggplant followed by peppers and mushrooms
4. Cover and stir on occasion until eggplant is cooked
5. Make miso mixture by mixing sesame oil, soy sauce, sake/mirin, sugar, miso and chilli
6. Turn up heat and add miso mixture
7. Stir from bottom until sauce gets thick
8. Serve on rice 


Enjoy the food!
食事を楽しんで!
Shokuji o tanoshinde!


Friday, 6 April 2018

Japanese Dashi and Miso Soup Recipe

Miso soup is a classic Japanese side dish to accompany a wide variety of meals or to serve as a appetizer before a meal. Making a good miso soup is very very easy and I found this really simple basic recipe to add a little extra something warm to a meal on a cold rainy day in Japan or as a nice appetizer for hungry guests as they wait for the main course.


To make miso soup you have to first make Dashi which is a type of soup stock/base that is used in a lot of Japanese dishes including miso soup or simmered tofu, fish or vegetables. It can also be added to vinaigrettes for salads.


This recipe for miso soup serves 2 people.

Ingredients:
3 cups water
1 ~10x10xcm sheet Kombu (type of seaweed)
2 pinches of Bonito Flakes (shaved flakes of dried fish) maybe about 1/4 -1/2 cup
1/2 cup Green Onion chopped
4 tbsp Miso paste (NOT red miso)

Primary Ingredients for Miso Soup

You can also optionally add other ingredients such as cabbage, tofu, etc. for additional substance. For vegetarian miso soup just leave out bonito flakes.

Method:
Step 1. First make dashi  by boiling water, kombu and bonito flakes.  I typically add the bonito flakes after the water is boiling with the kombu but some recipes say to add this even later and other say you should even soak the kombu before boiling. The kombu should soften completely and the water should change colour a little bit.You will be able to smell and taste when it is ready. I typically boil it on a medium heat for at least half an hour.

Step 2. You can optionally strain out the kombu and bonito flakes or leave these in. Mostly the bonito flakes are not left in and the kombu is cut into smaller pieces and left in the soup.

Step 3. Let dashi cool on a low heat and add miso paste when it is no longer boiling. Stir well.

Step 4. Serve and top with green onion and any other desired toppings.

Enjoy!

Thursday, 29 March 2018

Easy Teriyaki Sauce Recipe

Here is my simple and easy teriyaki sauce recipe that actually turned out amazing:

Ingredients:

1/2 cup sake
2 tsp sugar (option to replace a 1/4 cup of sake with 1/4 cup mirin instead of the sugar)
1/4 cup soy sauce
few slices of ginger (or to taste)
1 clove of garlic (or to taste)

Makes enough for cooking two chicken breasts with some sauce left for rice.

Step 1: Mix sake, soy sauce and sugar.
Step 2: Mince ginger and garlic and add into mixture.
Step 3: Cook mixture on medium heat to reduce amount of liquid a little bit (maybe 5-15 minutes). It is optional to add starch if you want to make a thicker sauce.

You can save sauce for other uses or make Teriyaki Chicken  or Teriyaki Stir-Fry with a few extra steps:

Step 4: Cook chicken in separate pan until mostly cooked through.
Step 5: Add chicken to sauce and cook while stirring and spooning the sauce over the chicken.
Step 6: Add other veggies to the pan and cook together until the liquid of sauce is mostly gone to make a stir-fry.


DONE!

Friday, 9 March 2018

A Gaijin Grocery Shopping in Japan

I really do love to cook and I was very much looking forward to going grocery shopping in Japan and finding all those unique ingredients that I would need to make Japanese food with. I imagined the adventure of looking through countless isles and finally finding that one thing I needed.

Reality was a bit different. I had no clue how to look for miso of other countless ingredients. I had no idea which of all of the sauces on the shelf were actually soy sauce. It took me incredibly long to even find salt and pepper!

I found it a bit frustrating at first but this is just part of acclimatizing to a new country where you can't read the language. Even with the language barrier everyone in Japan is extremely helpful. I frequently went to the counter asking in terrible Japanese "is this right for making ____?" and usually I was met with the person taking me around the store to find the proper ingredient since I had grabbed the wrong one.


Since then I found a lot of very helpful sites with recipes explaining what  ingredients are and what they look like in the store and advice for grocery shopping including the kanji and how to say ingredient names:
https://blog.gaijinpot.com/supermarkets-shopping-japan/

I wrongfully assumed that I could get away with making delicious Japanese foods without things like fish paste or algae but I must admit that this is a huge part of the flavor in so many of the soups. So here is my grocery shopping list of unique ingredients I use in some basic Japanese recipes:

Shoyu (Soy sauce)
Miso /Shiromiso (white fermented soybean paste)
Bonito flakes/ Katsuobushi (dried pieces of tuna)
Konbu (seaweed for making dashi)
Negi (a type of leek, you can also use green onion)
Sake (rice wine)
Mirin (sweet version of sake used for cooking)
Kombu, Miso and Bonito Flakes
Sansho (Japanese pepper)
Yuzu or other citrus fruit
Shiso (leaf herb used like basil)
Daikon (really big radish)
Katakuriko (potato starch)

At least eggs, peppers, carrots, onions, mushrooms and cabbage look the same wherever you are! I use these pretty much every day. I love the diversity of mushrooms in Japan.

Thursday, 24 November 2016

Recipes From The Road – Vinaigrette Pasta Salad


So basically cooking on the road is a lot of tossing together whatever you have at the time, generally including a lot of canned food. Once in a while you get to enjoy a fantastic meal with fresh food so good that it is worth sharing the recipe. Don’t blame me if you don’t find it as awesome because anything tastes fantastic when you’re hungry.

1 can of chick peas (Garbonzo beans)
1 can of corn
½ of a cucumber chopped
½ of a bell pepper chopped
¼ onion chopped
½ package of rotini pasta cooked and cooled
Grapeseed oil (to taste, we probably used a few tbsps)
Balsamic vinegar (to taste, we probably used a few tbsps)
Sprinkle on some Italian seasoning, basil and black pepper

Mix all of that together and you get a very delicious and easy to make pasta salad that gives you a taste of those fresh veggies you are craving.

Tuesday, 21 February 2012

Jamaican Recipes

Chicken or crab curry

Chop up and fry in a pot with some butter or oil:
Garlic
Onions
Scotch bonnet peppers
Scalions (or green onions)

Add:
Chicken (that is pre-cooked)
Carrots
Any other veggies you want
'Easy spice'
1 cup water

Cook in a pot for about 15 minutes. Serve with rice cooked with beans/ peas and carrots. The same method can be used to make king crab curry. 

Jamaican Greens
 Chop up and fry in a pot with some butter or oil:
Garlic
Onions
Scotch bonnet peppers
Scalions
Thyme

Add:
Bok choi
Spinach
Cabbage
'Easy spice'
1 cup water

Boil the majority of water out. Greens should be soft.